December 1, 2025

Comparing F8T5cw Light Bulbs For Longevity And Output

F8T5 Fluorescent Bulb Guide For Efficiency-Focused Lighting

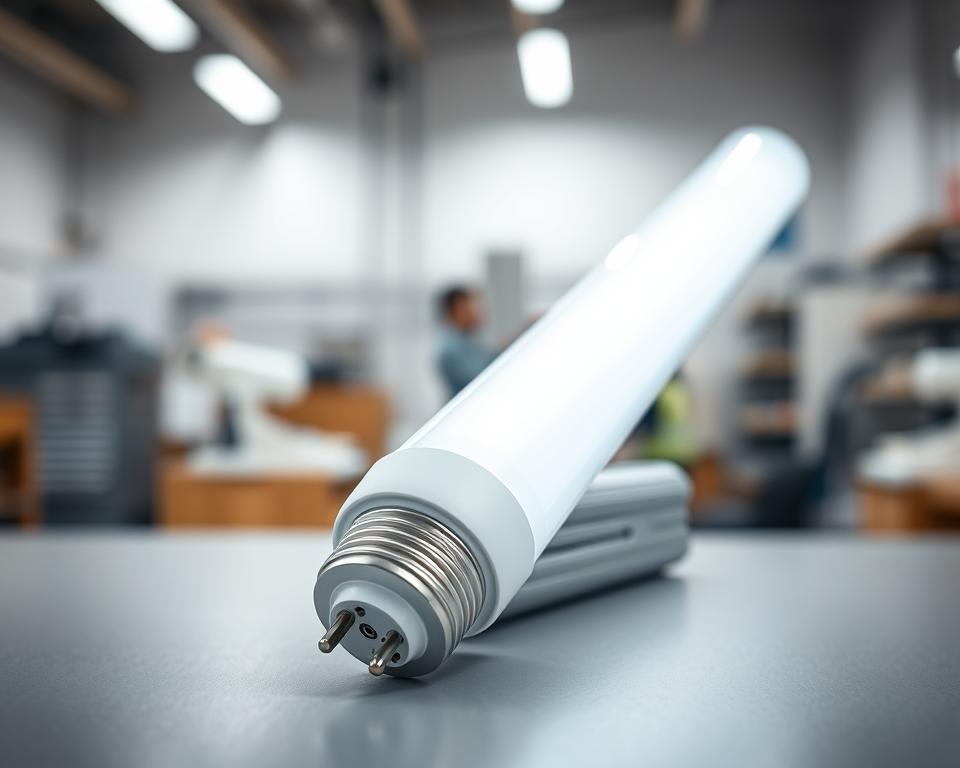
The F8T5 Fluorescent Bulb family is a compact, efficient choice for low-profile lighting needs. These slimline t5 fluorescent bulb tubes are built for under-cabinet, task, and display lighting fixtures. They are ideal where space is tight and uniform light is essential.

A typical f8t5cw bulb produces around 400 initial lumens while drawing roughly 8 watts. This makes it a strong contender for energy-efficient lighting in kitchens, showcases, and workstations. Common examples include the GE 10059 F8T5/CW 8 Watt Cool White 12in lamp and comparable 12-inch T5 mini bi-pin products from major brands.

This article is aimed at U.S. buyers and installers. It will cover specifications, performance expectations, installation tips, and where to source reliable units. Later sections will provide verified details on lumen output, color temperature, rated life, and compatibility. These details are meant to help you select the most suitable f8t5 bulb for your specific project.

Overview of F8T5 Fluorescent Bulbs and Energy-Efficient Lighting

This F8T5 family provides compact, usable illumination in a slim package. Because these tubes fit into slim housings, they preserve space behind cabinets and displays. Lighting designers often favor them because they provide uniform light in fixtures with limited depth.

f8t5 bulb

What is an F8T5 bulb

The term F8T5 describes a T5 linear fluorescent tube in the F8 classification. You’ll often see it sold as F8T5/CW, measuring roughly 11.91 inches long with a G5 mini bi-pin base. It draws about 8 watts, which suits narrow, low-profile fixtures that cannot accept larger lamps.

Why choose slimline t5 fluorescent bulbs for energy efficiency

Slimline t5 fluorescent bulbs use little power and produce steady light. Their compact design reduces fixture depth and material use. When combined with an efficient fluorescent ballast, they can deliver notable energy savings over older lighting options.

They work very well in rooms where controlled, directional lighting is important. Because their diameter is small and their distribution is even, they are ideal for both retrofits and new installations that prioritize space and energy efficiency.

Common applications: under-cabinet, task, and display lighting

Manufacturers typically recommend these tubes for undercabinet, display, and task-type lighting. The f8t5 bulb provides uniform output, reducing shadows on counters and in showcases.

Retail displays and museum cases benefit from these compact fluorescent lamps. They keep fixtures discreet while highlighting products. In kitchen settings, a correctly mounted f8 t5 bulb delivers focused prep lighting without requiring bulky housings.

One typical application is using a fluorescent task lamp in a shallow valance or under-cabinet setup. Installers value the combination of low-profile under cabinet lighting and dependable lumen output for daily tasks.

F8T5 Fluorescent Bulb Specifications

An F8T5 fluorescent bulb is a compact T5 mini bi-pin lamp engineered for focused task and display lighting. Products like GE 10059 F8T5/CW have an 8-watt rating, a G5 base, and a length of 11.91 inches. This format works well in slim, low-profile fixtures and under-cabinet housings.

F8T5 Core Specifications

It runs at 8 watts and uses G5 mini bi-pin contacts, with a tube diameter near 0.625 inches. Its ANSI designation aligns with standard T5 geometry, enabling interchangeability in many fixtures. Model codes like F8T5-CW or F8T5/CW confirm compatibility when ordering replacements.

Light Output And Color Temperature Details

It starts with 400 lumens and a 4100K cool white appearance. This 4100K color temperature works well in kitchens, display cases, and workbench areas. You get improved visibility thanks to the clear, neutral light it produces. Other T5 variants may have higher kelvins, but 4100K remains popular for consistent illumination.

Rated life and performance expectations

Manufacturers estimate an average life of 5,000 hours. As the lamp ages, initial lumens near 400 usually settle to mean lumens of about 320. These figures help plan for replacements and estimate lumen depreciation.

During purchasing, focus on labels like f8t5cw bulb, f8t5/cw bulb, f8t5 fluorescent bulb, or f8t5-cw. Ensure they match your fixture’s requirements for wattage, base type, and color temperature.

Technical specifications and performance of F8T5/cw 8 watt lamps

The F8T5/cw family offers compact, consistent light for low-profile fixtures. This short overview discusses electrical ratings, physical sizing, and color performance. This information helps you align the lamp with your fixtures and task lighting requirements.

Wattage And Electrical Specifications

The 8 watt rating on the F8T5/cw indicates a steady power draw under typical ballast operation. Operating voltage for these tubes is typically close to 57 V. They run on compatible fluorescent ballasts designed for T5 lamps. Use ballasts specified for T5 slimline tubes to maintain stable starting and the rated service life.

Physical Form Factor And Base

These lamps use a G5 mini bi-pin base, common in slimline task fixtures. They carry a nominal overall length of 12 inch M.O.L., with many listings noting 11.91 inches for exact fitting. Because the tube diameter matches standard T5 sizing, a t5 mini bi-pin bulb typically works as a replacement in most low-profile housings and under-cabinet fixtures.

Color Rendering Index And ANSI Standards

Cool-white F8T5/cw lamps usually show a CRI near 60, which highlights contrast in retail and utility environments. The product referenced conforms to ANSI 2003-1 specifications, aligning with legacy lamp performance and dimensional standards for linear fluorescent light bulb lines.

At-A-Glance Comparison

Key Attribute Details
Power 8 watts (F8T5/cw 8 watt)
Lamp Operating Voltage ~57 V typical
Lamp Base G5 mini bi-pin, suitable for t5 mini bi-pin fixtures
Overall length 12 inch M.O.L. (manufacturer lists 11.91 in)
Diameter T5 slimline, roughly 5/8 inch nominal
Color rendering Approximate CRI of 60
Compliance Standards ANSI 2003-1 compliant

Use these figures as a reference when selecting replacement lamps or planning retrofits. Matching ballast type, base fit, and length prevents installation issues. Doing so helps maintain expected lamp performance in the linear fluorescent light bulb applications you use.

F8T5/cw Versus Other Slimline T5 Lamps

Within the slimline T5 family, the F8T5cw is a popular choice for under-cabinet and display-type lighting. You’ll see differences in length, lumen output, and warranty terms between models. Check length and pin spacing carefully before purchasing a f8t5 replacement tube to prevent installation mismatches.

How F8T5cw Differs From 8-Inch And 12-Inch Models

Product labels can be misleading, since some lamps are labeled 8-inch while others show 12-inch. F8T5 lamps are frequently sold with a 12-inch M.O.L. designation. Always review your fixture’s requirements when deciding between 8-inch and 12-inch models. Choose the lamp size that matches your fixture dimensions and socket spacing.

Performance And Lumen Output Differences

For the GE F8T5/CW, you can expect roughly 400 initial lumens and a mean lumen level near 320. Some T5 alternatives deliver higher seeable lumens (for example 535 lm or 676 lm) because of different phosphors and glass characteristics. These distinctions influence how bright the lamp appears, rather than significantly altering wattage. Always compare spec sheets when upgrading.

Warranty, Service Life, And Manufacturer Claims

Some products come with extended warranties, like five-year guarantees on certain PHX and PHP series. Warranty language may cover lumen-maintenance guarantees or pro-rated replacement terms. Be sure to read the warranty details for any f8t5cw or 8-inch t5 fluorescent tube you buy so you understand coverage and expected life.

Key Feature F8T5/CW (GE) Higher-Output T5 Lamps Notes
Usual Length ~12-inch M.O.L. 8-inch or 12-inch variants Confirm M.O.L. and pin spacing for f8t5 replacement tube
Beginning Lumens Approx. 400 lm 535–676 seeable lm Phosphor blend and glass type impact visible output
Mean lumens Around 320 lm Varies by line; some claim under 7% lumen loss Review lumen-maintenance curves when evaluating products
Warranty Basic manufacturer warranty Certain models include 5-year warranties A longer warranty may reflect strong lumen-maintenance expectations

As you decide between an f8t5cw, an 8-inch t5 fluorescent tube, or longer T5 lamps, evaluate tube size, lumen output, and warranty terms. Use specification data to align lamp performance with your requirements, then select the correct f8t5 replacement tube for reliable operation.

Ideal uses: low profile under cabinet lighting and kitchen under cabinet lighting

The slim F8T5 shape fits comfortably in tight spaces while delivering a clean, linear glow. This makes it perfect for cabinets, display cases, and smaller showcases. Its compact size is ideal for low profile under cabinet lighting without bulky housings.

Why slim fixtures perform well

A slimline t5 fluorescent bulb offers even illumination along its length. This even spread reduces hot spots and glare. In retail displays and kitchen shelves, it makes merchandise and countertops appear consistent and true to color.

Advantages For Task Lighting Zones

Using a fluorescent lamp for task lighting brings neutral-cool tones. These tones enhance visibility for tasks such as prepping, chopping, and reading recipes. The F8T5/CW 4100K output delivers crisp contrast and can reduce eye strain on work surfaces.

Practical installation notes

Measure the depth of your fixture and verify end-cap spacing before purchasing a new tube. Because of the G5 mini bi-pin base and roughly 12-inch M.O.L., specific housings are required. For kitchen under cabinet lighting, verify the ballast type or consider an LED retrofit with the same footprint.

Choosing The Right Setup

Low-profile housings frequently work best with components dedicated to T5 lamps. If you’re replacing an older strip, verify ballast compatibility and ensure secure mounting for even linear illumination. Positioning the lamp correctly over the countertop reduces shadows and gets the most benefit from this compact solution.

Installation, Ballasts, And Compatibility Considerations

First, shut off power and carefully remove the old lamp. Ensure the new replacement fits by checking length, socket spacing, and the G5 mini bi-pin base. This check avoids mechanical fit issues when installing an f8t5 replacement tube or f8t5/cw bulb.

Choosing a compatible fluorescent ballast is essential to maintain the original fixture’s wiring. Most F8T5 lamps need an 8W ballast that is specifically designed for T5 mini bi-pin tubes. If the ballast is mismatched, it can cause flickering, shorten lamp life, or prevent the lamp from starting. Fixtures equipped with an electronic ballast rated for 8W T5 tubes generally support an f8t5cw light bulb without changes.

Direct-wire conversions eliminate the ballast and wire the fixture for LED tubes. It is crucial to follow the LED manufacturer’s ballast-bypass directions and comply with local electrical codes. You’ll need to verify line voltage routing and make sure the chosen retrofit safely takes the place of the ballast.

When purchasing a replacement, ensure the model codes match exactly. Bulbs labeled GE 10059 F8T5/CW, F8T5-CW, or F8T5CW generally share identical form factor, wattage, and color temperature. Before you place an order for an f8t5 replacement tube, verify the M.O.L. (about 11.91 in), base type, and 4100K cool white spec.

During retrofit work, inspect the mounting clips, diffuser clearance, and ballast compartment area. Always test just one lamp before converting an entire run of fixtures. If you decide to keep the ballast, choose one rated for 8W T5 tubes that is compatible with instant-start or programmed-start operation.

For troubleshooting, swap suspect f8t5cw tubes into a known good fixture to isolate failures. If you notice hums or intermittent operation, consider replacing old ballasts. When retrofitting to LEDs, confirm if dimming is supported and that the retrofit is listed for ballast bypass installations.

Energy Savings, Environmental Considerations, And Regulatory Notes

An 8-watt F8T5 tube can markedly cut task lighting energy consumption relative to incandescent options. When you pair it with the correct ballast and fixture, this linear fluorescent light bulb delivers efficient illumination at a lower wattage. It often outperforms larger, older fluorescent tubes by minimizing system losses.

How Efficiency Compares To Older Lamps

In under-cabinet and display applications, the 8-watt F8T5 provides focused illumination with lower energy costs. Replacing incandescent lamps with this option can lead to immediate savings on electricity. Bringing older linear fluorescent fixtures up to date can boost lumens per watt and reduce noticeable flicker.

Mercury Content And Handling Fees

Fluorescent lamps contain a small, sealed amount of mercury. In some locations, a mercury handling charge is applied at purchase to fund disposal and recycling. For example, Washington State applies a $0.95 charge per lamp. Different states may operate various take-back programs or set their own fee structures.

Best Practices For Disposal And Recycling

You should not place used tubes in regular trash, since that is frequently prohibited. Instead, use municipal hazardous waste collection, authorized recycling centers, or retailer take-back programs. Always handle tubes carefully to avoid breakage during transport.

Step Why This Matters Destination
Recycle intact tubes Supports material recovery and prevents mercury release Local recycling center or retailer take-back
Use household hazardous waste drop-off programs Provides a legal disposal route where curbside disposal is banned Local municipal waste collection centers
Pay applicable handling fees Funds appropriate disposal and regulatory compliance efforts At checkout or as specified in product listings (varies by state)
Follow EPA cleanup steps if broken Lowers the risk of exposure and environmental contamination EPA guidance and local health departments

Proper disposal of f8t5 fluorescent bulbs is essential. Handling them as recyclable hazardous items maintains the energy-saving benefits and prevents mercury pollution. Retailers like Home Depot and Lowe’s often list recycling options and state fees on product pages for linear fluorescent light bulb purchases.

Where To Buy F8T5 Bulbs And How To Use Wholesale Options

Finding a reliable supplier is crucial when purchasing F8T5 lamps in bulk. Make sure they maintain adequate stock, offer warranties, and list accurate part numbers. Select distributors that clearly specify length, base type, color temperature, and rated life in their listings.

Wholesale Distributor To Consider

Installation Parts Supply is often seen as a trusted wholesale source for lighting professionals. Their catalogs feature a range of products, including slimline T5 lamps, replacement ballasts, and essential retrofit accessories. Purchasing in bulk through a distributor can shorten lead times and streamline warranty claim processes.

What to look for in product listings

Ensure model codes match to avoid color or base type mismatches. Look for specific designations like GE 10059 F8T5/CW, F8t5-cw, or F8T5/CW 8 watt. To guarantee compatibility, verify the G5 mini bi-pin base and the 4100K cool white color temperature.

Price indicators and value

Look at MSRPs, promotional prices, and bulk discounts to determine overall value. As an example, the GE 10059 F8T5/CW might carry an MSRP close to $3.67 and a sale price around $2.93. Consider distributor warranties and bulk pricing tiers when calculating the cost per lamp for your project.

As you look into f8t5 bulb wholesale options, be sure to ask for stock sheets and current lead times. Review return policies and verify consistent naming, such as f8 t5 bulb or f8t5-cw, to prevent shipping errors.

Maintenance, Expected Lifecycle, And Troubleshooting

Regular care is key to keeping slimline fixtures bright and reliable. Over time, dust buildup can substantially lower lumen output. It’s important to track usage hours and check for color shifts or darkening at the ends of the tubes. Handle fluorescent lamps with gloves or a soft cloth to keep oils off the glass surface.

Most F8T5 lamps carry a design life of roughly 5,000 hours. They begin at roughly 400 lumens, then gradually decline to about 320 lumens over their life. This means you should plan to replace them so lighting levels remain adequate before output falls too far.

Common issues and quick diagnostics

Flickering can indicate that the tube is nearing the end of its life or that the ballast is failing. If flickering only occurs at startup, swapping the lamp can help confirm the issue. Ballast hum or noise often points to an outdated magnetic ballast or loose connections. Keep in mind that many T5 tubes are non-dimmable and need a compatible electronic ballast for dimming, which may influence stability and service life.

When To Replace Your F8T5 Bulb

Steady dimming, yellow or green color shifts, and more frequent flicker are all signs that it’s time to replace the tube. For critical displays, it is often better to replace lamps on a schedule based on mean lumen requirements, even before visible decline appears. As you select a replacement, confirm that it matches ballast type and color temperature, whether the choice is an f8t5cw light bulb or an f8t5 replacement tube.

Problem What’s Likely Happening Recommended Action
Flickering Only At Startup Aging lamp or weak starter/ballast Test with a known-good tube; replace lamp or ballast as needed
Flicker During Operation Loose connection or poor G5 pin contact Turn off power, reseat the tube, and tighten any loose connections
Dim Light While Powered Lamp near or beyond rated lifetime causing lumen loss Check light levels and schedule an f8t5 replacement tube
Noise From Fixture A worn magnetic ballast or fixture vibration Replace with electronic ballast or secure fixture
Erratic Dimming Behavior Incompatible dimmer or non-dimmable lamp Install a proper electronic dimming ballast or disable dimming

For consistent performance, keep a log of runtime and have spare f8t5cw light bulbs ready. Routine upkeep not only limits downtime but also keeps lighting consistent across the f8t5’s service life.

Conclusion

F8T5 Fluorescent Bulb models, such as the F8T5/CW 8 watt T5 mini bi-pin, provide a compact, energy-efficient lighting solution. They work especially well in low profile under cabinet lighting, task zones, and display applications. Around 400 initial lumens, a 4100K cool white tone, and a CRI near 60 combine to give a balanced performance in confined areas.

During purchasing, always verify product codes like GE 10059 F8T5/CW. Confirm the 11.91–12 inch M.O.L., and verify the G5 base along with ballast compatibility. Reputable distributors like Installation Parts Supply list model specs and warranty details. Comparing lumen output, rated life, and warranty terms helps find the right lamp for your fixture and usage.

For maintenance and end-of-life planning, time replacements around lumen depreciation to a mean of about 320 lm. Adhere to local recycling regulations for fluorescent lamps and account for any state-specific handling fees. If you’re pursuing energy-efficient lighting, the f8t5cw offers a realistic and slimline solution. Consider ballast type, expected runtime, and warranty differences before making your final selection.

Tolerances And Accuracy In Ceramic Injection Molding (CIM)

Understanding Ceramic Injection Molding for Accurate, Complex Parts

Can one manufacturing method really offer metal-level tolerances, intricate geometry, and heat-resilient materials at the same time?

This is a concise guide to a scalable manufacturing technology that enables complex, high-precision ceramic parts — website. This method mixes fine powder with a binder to create feedstock. The feedstock is subsequently injection molded, debound, and sintered to reach near-theoretical density.

Its major benefits are broad design freedom, repeatable output, tight dimensional tolerances, and surface quality on par with many metal processes. It is especially effective when CNC machining or tape casting have difficulty with very small, intricate components.

Dimensional shifts from sintering shrinkage are expected, and early design-for-process decisions significantly reduce rework and overall cost. This manufacturing route supports mid-to-high production volumes where tooling cost and cycle time are justified by part counts.

Use cases include aerospace, automotive, medical, electronic, and industrial parts that must resist wear, high temperature, or corrosive conditions. This article walks the step-by-step journey from materials selection through QA and highlights simulation and metrology tools to secure reliable outcomes.

ceramic injection molding

What Ceramic Injection Molding Is and Why It Matters Now

This injection molding approach for fine-powder parts uses a thermoplastic or wax binder mixed with powder to form a flowable feedstock. That feedstock fills complex cavities to create green parts with features that are hard to achieve by slip casting, dry pressing, or isostatic pressing.

How It Differs from Traditional Ceramic Forming

Compared with slurry or powder compaction techniques, this approach enables internal passages, undercuts, and thin sections in small-to-medium components. Throughput is higher and variability is lower than manual methods.

Its Role in Modern Production Workflows

Typical flow: design for shrinkage → tooling → molding → debinding → sintering → finishing. Cycle times commonly fall between a few seconds and a few minutes per shot. Volume sweet spots are mid-to-high runs where tooling pays off.

“Design validation via DOE studies and pilot runs lowers risk ahead of full-scale production.”

Forming Method Geometry Complexity Output Rate Labor
Injection feedstock route High, including undercuts and channels High Low (automatable)
Slip-casting Moderate geometric complexity Low Labor intensive
Isostatic or dry pressing From simple to moderately complex Moderate Medium labor need

After sintering, lapping or laser-based features can be applied to refine tolerances. It fits smoothly with SPC and PPAP systems, enhancing traceability and overall process control. Key modern advantages include efficiency, lower scrap rates, and unlocking complex designs that would be prohibitively costly by other means.

Core Principles of the Ceramic Injection Molding Process

Here we break down the stepwise route that transforms fine powder and binder into a stable part suitable for sintering.

From powder and binder to a finished component

First, choose powder that offers the correct particle size distribution and surface area. Such parameters influence packing density, flow viscosity, and the resulting microstructure.

  • Combine the powder with a customized binder system and compound it into feedstock with a solids loading usually around 55–65 vol%.
  • Form the green part via injection, carefully placing gates to minimize weld lines and packing variations.
  • Debind to yield a fragile brown part and then sinter it to near-theoretical density.

Binders must flow adequately for cavity filling, maintain shape during handling, and leave cleanly during debinding to avoid blisters or cracking.

Feedstock rheology, specifically viscosity as a function of temperature and shear, controls fill behavior, knit lines, and surface quality. Machine geometry and the screw/barrel design in CIM equipment preserve feedstock uniformity and reduce degradation.

“Keep the processing window tight — even minor changes in temperature or pressure can trigger short shots, voids, or bad surfaces.”

Relative to MIM, ceramic injection molding uses higher sintering temperatures and modified atmospheres to align with ceramic chemistries and densification requirements.

Materials and Feedstock Preparation for High-Precision Ceramic Parts

Choosing appropriate powders and binders lays the foundation for predictable, high-precision parts.

Choosing Powders and Key Specifications

Alumina excels where wear resistance and electrical insulation matter for website. Zirconia provides improved fracture toughness in components that experience shocks. Silicon carbide is suitable for high-temperature, highly abrasive environments.

Carefully control particle size, morphology, and purity. Fine, spherical powder enhances packing density and surface finish. Irregular particles may raise green strength while potentially making the final surface less smooth.

Binder Systems and Their Ratios

Common binder families include waxes and polyolefins such as polyethylene and polypropylene, plus specialty polymers for difficult shapes. The binder percentage directly influences melt flow behavior and debinding duration.

Compounding and Rheology Control

Follow a consistent compounding route: blend powder dry, add polymers incrementally, and manage temperature and shear carefully. Limit peak temperatures to prevent binder degradation.

Evaluate feedstock using capillary rheometers or torque rheometers to confirm viscosity windows for dependable filling and packing. Strive for a solids loading that balances shrinkage and final density, commonly near 55–65 vol% for high-density parts.

Storage, Handling, and Drying Practices

Store powders in tightly sealed containers and operate with FIFO inventory control. Manage humidity for hygroscopic components and thoroughly dry pellets before molding to minimize voids and surface defects.

Apply proper PPE and dust-control measures during handling of fine powders and heated polymers. Collaborating early with suppliers on powder and binder choices accelerates validation and reduces iteration risk.

How to Design Parts Specifically for Injection Molding

Designing for this route begins with clear goals: achieving tolerances while minimizing post-sinter machining. Initial CAD choices influence shrinkage, structural strength, and how easily green components can be handled.

Wall thickness, gates, and knit line management

Aim for uniform wall thickness with smooth transitions to reduce sink and warping. Place gates so that flow moves away from cosmetic or high-stress regions, limiting knit lines in those areas.

Incorporate a shrink map and scale important features in the mold to reach final dimensions. Use flow simulation and design-for-manufacture review to validate the concept prior to tooling.

Draft, radii, and features for debinding/sintering

Provide modest draft angles and generous radii to ease demold and lower stress concentrations. Add vents, sacrificial channels, and setters as needed to aid debinding and stabilize delicate shapes.

Define datums and inspection features based on how parts are fixtured during sintering and quality checks. Allow only minimal finishing stock on critical fits, avoiding excessive material that drives up cost.

Design Focus Guideline Resulting Benefit Check Method
Wall thickness Uniform thickness with gradual transitions Reduced warpage and more predictable shrinkage Simulation / prototype
Gate placement Out of cosmetic/stress zones Reduced knit lines Flow analysis
Features for Debinding Incorporate vents, flow channels, and setters Safer brown parts with fewer cracks DFM and process review

Tooling and Mold Considerations for Ceramic Injection

A well-designed toolset reduces scrap and improves dimensional control across long production runs. Start with material choices and surface engineering to handle abrasive feedstock and tight tolerances.

Mold materials should resist abrasion and thermal cycling. Select high-performance steels or nickel-based alloys and add wear-resistant coatings for extended tool life.

Balance cavity surface finish to support easy release yet preserve fine detail. Avoid AMT textures that can trap binder or lead to sticking. Engineer adequate venting to expel air and volatiles, preventing burn marks and short shots.

  • Pick gate styles (edge, submarine, hot-tip) and runner designs that encourage balanced flow and minimize weld lines.
  • Optimize cooling circuits to stabilize cavity temperature and lower cycle variability.
  • Use robust ejection—stripper plates or air assist—to protect fragile green parts during demold.
  • Employ interchangeable inserts so gates, vents, and critical features can be adjusted quickly.
  • Consider tolerance stack-ups and compensate cavities according to expected shrinkage.
  • Integrate in-cavity sensors for pressure and temperature to track the process and support closed-loop control.
  • Plan regular maintenance and wear inspections so tooling performance remains stable during extended production.

These measures tighten dimensional control and reduce downstream rework. They also promote scalable production with modern molding technology and protect tool investment.

Step-by-Step Guide to Running the Injection Molding Stage

Stable press cycles depend on well-defined temperature maps, pressure profiles, and disciplined operation. Start with a clear start-up checklist that safeguards both feedstock and machinery from thermal shock.

Setting Up the Machine: Temperature, Pressure, Injection Speed

Adjust barrel and mold temperature profiles to stabilize viscosity and prevent binder breakdown. Tune injection speed and pressure profiles so complex features fill fully without jetting or visible flow lines.

Filling, Packing, and Cooling for Tight Tolerances

Employ multi-stage packing profiles to compact green parts and minimize internal voids. Set cooling time to provide sufficient handling strength while preserving efficient cycle times. Use structured purging and changeover routines so different feedstocks do not cross-contaminate.

Demolding without damaging green parts

Use low-friction coatings and controlled mold release agents where appropriate. Use controlled ejection and guarded fixtures to protect delicate features. Train operators to recognize defects early and halt production if necessary.

Control Set Point Key Benefit
Temperature profiles Stable viscosity behavior Fewer short shots and more consistent surfaces
Injection pressure/speed profile Multi-stage, programmed ramps Complete filling with fewer weld lines
Packing & cooling Multi-stage with balanced timing Stable density and controlled dimensions

Debinding Methods and Practical Best Practices

Successfully removing binder is a crucial step in transforming a fragile green part into a sinter-ready component.

In practice, two debinding methods dominate: solvent-based debinding and thermal debinding. Solvent debinding extracts the soluble binder fraction first. Thermal debinding then takes out the remaining polymer via controlled pyrolysis.

Solvent Versus Thermal Debinding Approaches

Solvent debinding quickly removes soluble phases and lowers internal pressure during subsequent stages. Thermal debinding is slower but essential to remove the less-soluble polymer fraction. The optimal method depends on binder chemistry and the geometry of the part.

Avoiding Defects During Debinding

Fixture choice and part orientation matter. Support fragile areas and allow free escape paths for volatiles to prevent cracking and distortion.

Use gentle heating ramps, staged hold times, and controlled airflow to avoid pressure spikes that cause blistering. Parts with thick walls or blind cavities often need extended cycles or additional venting.

Pick solvents with recovery systems and proper ventilation. Follow MSDS guidance and local environmental rules to protect workers and comply with regulations.

  • Run test coupons and sacrificial parts to confirm full binder removal before sintering.
  • Monitor for unusual odor, discoloration, or mass-loss curves, which may indicate incomplete debinding.
  • Troubleshoot skin formation, delamination, or slump by slowing ramps, improving venting, or adjusting fixture layout.

Successful debinding is closely linked to molding quality; voids or knit lines frequently act as failure points during binder removal. Capture debinding temperature/mass curves to standardize processing and safeguard end-part quality.

Sintering for Final Density and Performance

Carefully controlled sintering is the critical step that turns a fragile brown body into a dense part ready for service. Furnace recipes establish microstructure, porosity, and mechanical behavior that dictate long-term performance.

Temperature Profiles, Atmospheres, and Shrinkage Control

Apply a three-step profile: a slow heat-up to remove residual binder, a controlled ramp into densification, and a measured cool-down to prevent thermal shock.

Match atmosphere to material: air for alumina-type oxides, inert or reducing for carbides and some engineered mixes. The right gas preserves chemistry and color while limiting grain boundary reactions.

Measure shrinkage using sacrificial coupons and fold those measurements into cavity compensation. Create setters and supports that limit warpage and keep gas flow evenly distributed.

Achieving strength, corrosion resistance, and wear resistance

During sintering, grain size and porosity evolve, influencing flexural strength and fracture toughness. Target high density with controlled grain growth to hit strength objectives.

Tune material chemistry and soak schedules to maximize corrosion resistance and surface hardness for wear. Use post-sinter HIP when remaining porosity compromises fatigue or sealing behavior.

  • Document furnace recipes and use thermocouples or pyrometry to validate performance.
  • Maintain consistent orientation and spacing of parts to keep temperature and atmosphere exposure even.
  • Watch for defects: slumping, exaggerated grain growth, and trapped porosity—slow ramps and better support often fix these.
Process Parameter Typical Target Effect on Properties Manufacturing Tip
Ramp Rate 1–5 °C/min for debinding, 5–20 °C/min for sintering Reduces cracking; controls grain growth Match to binder and part mass
Soak temperature & time Material-specific peak; minutes–hours Raises density and reduces open porosity Use coupons to set soak
Gas atmosphere Air, inert, or reducing, depending on material Preserves chemistry and prevents unwanted oxidation Monitor gas flow and purity continuously
Post-sinter processing Hot isostatic pressing or annealing Eliminate residual porosity; boost strength Use for parts that require maximum performance margins

“Consistent sintering recipes and validated furnaces directly raise yield and cut finishing rework.”

Quality Control, Metrology, and Tolerances

A robust metrology plan converts shrinkage uncertainty into predictable tolerances. Begin with clear inspection checkpoints at green, brown, and sintered states to detect deviations early.

Shrinkage Measurement and Mold Compensation

Use shrinkage correlation charts generated from pilot runs to scale cavity dimensions. Validate these values with sacrificial coupons and update the mold compensation map before full tooling or production runs.

Checking Surface Quality, Microstructure, and Porosity

Inspect surface finish and density using profilometers and Archimedes testing. Internal porosity that affects mechanical performance is revealed by micro-CT and optical scanning.

  • Define inspection plans across green, brown, and sintered states with pass/fail gates.
  • Apply metrology: CMM, optical scanners, surface profilometers, micro-CT for internal verification.
  • Link grain size and pore distribution data to measured strength and wear behavior.
Stage Metrology Tool Key Metric Recommended Action
Green stage Optical scanner Dimensional match to design Adjust mold compensation factors
Brown parts X-ray micro-CT Void and pore distribution Modify the debinding cycle
Final sintered parts CMM and surface profilometer Final dimensions and surface roughness (Ra) Finalize process & release
Batch control Statistical process control tools Cp, Cpk, density Hold or release production lots

Implement SPC and capability studies prior to PPAP. Maintain traceability from lot-level powders and binders through batches. Calibrate gauges, run MSA, and define nonconformance flows with root-cause action plans.

“Reliable measurement and traceable data close the loop on production quality.”

Industry Applications and Use Cases in the United States

Within the U.S., producers often choose feedstock-based production when parts need low mass and strong wear resistance. Across aerospace, automotive, medical, and electronics, suppliers use this route to meet tight specs and harsh environments.

Aerospace: High Strength-to-Weight Components

In aerospace applications, manufacturers call for lightweight wear components, nozzle inserts, and thermal barrier parts with high strength-to-weight ratios.

These components improve fuel efficiency and survive temperature cycling and vibration in engines and actuation systems.

Automotive Applications: Thermal Stability and Durability

In automotive systems, pump components, sensor housings, and exhaust-area insulators are common use cases that demand thermal stability and durability.

Shifting from metal to engineered powder components helps reduce corrosion and lengthen service life under demanding under-hood conditions.

Medical and electronics: miniaturization and precision

Medical and electronics markets benefit from micro-scale insulators, ferrules, implantable device components, and biocompatible wear parts.

These components demand tight tolerances, high dielectric performance, and validated biocompatibility or dielectric testing before production release.

  • Performance edge: superior wear and corrosion resistance make these parts ideal for harsh service conditions.
  • Regulated production commonly aligns with AS9100, IATF 16949, or ISO 13485, requiring detailed documentation and traceability.
  • Design-for-assembly is important for hybrid systems that join these parts to metals or polymers.
Project Stage Typical Lead Time (U.S.) Comment
From tooling to pilot Roughly 6–12 weeks Dependent on insert and tool complexity
From pilot to SOP Around 4–8 weeks Validation and qual testing
Overall About 10–20 weeks Domestic supply chains help shorten logistics and lead times

Validation can involve biocompatibility studies for implants and dielectric testing for electronics. Many success stories show this approach replacing metal designs to cut weight and remove corrosion failure modes in service.

Costs, Cycle Times, and When CIM Beats Machining

Understanding the economics helps determine whether formed-powder production or machining is the better route. Start by mapping the main cost drivers and how cycle time affects cash flow.

Primary Cost Drivers

Tooling and mold amortization often dominate initial spend. Using high-performance steels or interchangeable inserts increases up-front cost but lowers per-piece cost as volume grows.

Material/feedstock usage, press time, furnace soak duration, labor, and yield losses all contribute to true landed cost. Secondary finishing, inspection, and packaging also play a notable role.

Key Driver Impact How to Reduce Impact
Tooling/Mold High initial cost; lower per-part cost at scale Use modular inserts and spread cost over more units
Feedstock and material Recurring cost; impacts density and scrap Negotiate feedstock pricing and refine solids loading
Machine & furnace time Sets throughput and cash flow Balance press cycle times with sintering batch size
Yield/Rework Hidden cost driver Design for uniform walls and optimized gate positions

When CIM Outperforms Machining

For complex geometries and mid-to-high volumes, per-part costs typically fall below machining costs. Machining brittle blanks creates much scrap and long cycle times for internal channels.

Machining remains the better option for very low volumes, oversized components, or situations where tighter post-sinter tolerances are required.

“Thoughtful design optimization and batch planning convert fixed costs into competitive per-part pricing.”

Practical quoting heuristics

  • Estimate tooling payback by dividing tooling cost by expected units to get a per-part tooling cost.
  • Add material, machine time, furnace time pro rata, labor, QA, and packaging to obtain unit cost.
  • Include a scrap buffer (typically 5–15%) plus an allowance for secondary finishing.

These steps outline total cost of ownership and highlight where design improvements, process choices, and smarter tooling yield the greatest advantages.

Troubleshooting Common CIM Defects

Identifying the root cause of short shots or warpage calls for reliable data and systematic troubleshooting. Use a simple checklist to separate problems that start in molding, debinding, or sintering.

Common Defects and How to Diagnose Them Quickly

Short shots and voids happen when injection speed or pressure is too low, vents are blocked, or feedstock carries moisture.

Unequal packing, inconsistent cooling, or poor support in sintering frequently leads to warpage.

Weak knit lines and delamination usually respond to improved gate design, elevated melt temperatures, or better flow balancing among cavities.

  • Blistering or cracks during debinding often stem from rapid ramps, uneven mass, or inadequate solvent access.
  • Inspect for mold wear or cavity damage when new defects emerge late in a production campaign.
  • Use incoming inspection to control feedstock variability and moisture.

“Structured tools like Ishikawa diagrams and the 5-Whys help isolate which stage is driving failures.”

Observed Defect Likely Cause Immediate Action
Short shot/void Insufficient pressure/speed or blocked vents Increase injection pressure or speed and clear vents
Distortion/warp Uneven packing or cooling Rebalance fill pattern and refine cooling profile
Blistering/cracking Over-aggressive debinding ramps or solvent issues Slow ramp; test solvent

Use DOE studies to optimize parameters and validate corrections. Track defect codes and Pareto charts to focus improvements. Close the loop between press operators, furnace techs, and QA to shorten time-to-correct and raise overall quality in the process.

Safety, Regulatory Compliance, and Sustainable Processing

Protecting workers and the environment is just as important as meeting tolerances in modern powder-based production.

Handling Powders and Binders Safely

Use PPE: N95 or P100 respirators, chemical-resistant gloves, eye protection, and protective clothing for dry powder and hot binder work.

Provide local exhaust systems and HEPA filters to capture fugitive dust. Enclose transfer points and use grounded transfer lines to lower static-related risks.

“Training on spill response, binder hazards, and safe storage, backed by regular drills, makes audits straightforward.”

Waste, recycling, and energy considerations

Separate waste into distinct streams—powder, used binder, solvent residues, and general trash. Clearly label containers and keep powder and solvent streams segregated to enable recovery.

Use closed-loop solvent recovery and carefully controlled regrind of feedstock where quality is maintained. This reduces disposal costs and preserves raw materials.

Schedule furnace loads to maximize fill and minimize peak demand. Improve furnace insulation, use efficient motors/variable-speed drives, and track energy data for continuous improvement programs.

Follow OSHA and EPA rules for hazardous air pollutants, solvent emissions, and recordkeeping. Maintain documented procedures, training records, and material safety data sheets so they are ready for audits.

Design parts to reduce mass and cycle time; these straightforward choices lower energy use and provide environmental advantages while keeping production reliable.

Next Steps: Bringing Your Ceramic Injection Molding Project to Production

Turn design intent into reliable production by sequencing material trials, tool proofs, and pilot runs.

Use a practical checklist: choose feedstock, complete DFM, run flow simulations, build prototype tooling, conduct validation runs, and finally carry out PPAP or a similar approval process.

Set milestones from RFQ → prototype tool → capability studies → first article inspection → SOP. Agree deliverables and timelines with suppliers to de-risk early choices.

Document control plans, work instructions, and key quality metrics before beginning pilot production. Plan capacity around press tonnage, furnace volume, debind throughput, and staffing levels.

Target early wins where precision and complex geometry add value. Maintain quality using preventive maintenance, gauge R&R, and periodic requalification of processes.

Ready to proceed? Ask for a feasibility assessment and cost model aligned with your parts, volume expectations, and performance targets.

Frequently Asked Questions

How are precision ceramic parts produced using injection techniques?

The process starts by mixing fine oxide or carbide powder with a polymer-based binder to form a homogenous feedstock. That feedstock is then injected under pressure into a mold, forming a green part. After molding, binder removal occurs via solvent and/or thermal debinding, followed by sintering to achieve final density and mechanical properties. Every stage — compounding, molding, debinding, and sintering — must be carefully controlled to meet tight tolerances and performance goals.

How does this method differ from traditional forming like pressing or slip casting?

Unlike pressing or slip casting, which shape parts one at a time or require significant machining, injection enables high-volume production of complex geometries with fine features and consistent repeatability. This method frequently cuts down post-sinter machining, raising material yield and reducing per-part cost as volume increases.

What materials are typically used for high-precision parts in this process?

Typical powders include alumina, zirconia, and silicon carbide. Tungsten carbide blends are selected when very high wear resistance is needed. Selecting the right powder depends on required strength, thermal stability, corrosion behavior, and electrical performance. Proper powder surface chemistry and particle size distribution also affect feedstock flow and final density.

What is the role of binders and how are they selected?

The binder system provides flow and cohesion in molding, and then must be removed cleanly without harming the part. Binder systems usually combine waxes and polymers in controlled ratios to achieve viscosity, green strength, and predictable debinding. Selection depends on part geometry, debinding method, and environmental or safety requirements.

How are shrinkage and tight tolerances handled in design?

Designers compensate by scaling mold cavities to offset predictable linear shrinkage during sintering. They control wall thickness, include generous radii, and position gates carefully to reduce knit lines and distortion. Close collaboration with manufacturers helps define realistic tolerances based on material and process capability.

What mold design aspects have the biggest impact on part quality?

Filling, packing, and demolding behavior is shaped by mold material, surface finish, vent design, and gate/runner layout. Hardened steel molds with polished surfaces typically cut surface defect rates. Proper venting prevents trapped gas and short shots, while optimized gates yield consistent feedstock flow and reduce weld lines.

How is the molding stage optimized for tight dimensions?

Machine parameters — barrel and mold temperature, injection speed, and holding pressure — are tuned to ensure complete cavity fill and consistent packing. Cooling and demolding timing are set to avoid distortion of green parts while maintaining cycle efficiency. Tracking process data closely allows variation to be kept low.

Which debinding methods are used and in which situations?

Solvent debinding targets the soluble portion of the binder and is often preferred for intricate features. Thermal debinding ramps temperature to evaporate or pyrolyze the remainder and is often used after solvent steps. The choice depends on binder chemistry, part thickness, and risk of cracking or blistering.

How do manufacturers avoid defects like cracking or blistering during debinding?

Manufacturers control ramp rates, maintain vent pathways, and design staged solvent/thermal sequences suited to the specific feedstock. Uniform binder removal and minimizing internal pressure during decomposition reduce stresses that cause cracks or blisters.

Which sintering practices help ensure final strength and wear/corrosion resistance?

Sintering profiles, including temperature, hold time, ramp rate, and atmosphere, are tuned for densification while restraining grain growth. Controlled atmospheres or isostatic post-sinter densification may be used to achieve target density, strength, and surface properties like wear and corrosion resistance.

How is consistent quality maintained from run to run?

Quality control uses dimensional inspection adjusted for shrinkage, microstructure analysis, porosity checks, and mechanical testing. Statistical process control is applied to key parameters, and first-article inspection confirms that tooling compensation and sintering produce the desired results.

Which U.S. industries benefit most from ceramic injection molding?

Aerospace, automotive, medical devices, and electronics benefit most. Common applications are thermal/wear-resistant parts, high-strength tight-geometry components, and miniature parts that are difficult or expensive to machine.

When does this approach beat traditional machining on cost?

It becomes economical when volumes rise, geometries are complex, or part consolidation reduces assembly steps. Tooling cost spreads over a large number of parts, and less machining means lower scrap and per-part cycle cost.

What molding defects are common and how are they usually diagnosed?

Common issues such as short shots, voids, warpage, and delamination often trace back to feedstock quality, mold venting, process parameters, or downstream debinding/sintering. Root-cause analysis maps defect location to process step, then isolates variables like pressure, temperature, or feedstock rheology for correction.

Which safety and environmental issues matter most with powders and binders?

Apply local exhaust, dust collection, and suitable PPE when working with fine powders. Manage solvent and binder waste per OSHA and EPA guidelines. Recycling of scrap feedstock and energy-efficient sintering reduce environmental footprint.

What first steps should a company take to move from prototype to production?

Begin with material selection and a design-for-manufacturability review. Produce pilot parts to validate feedstock behavior, mold compensation, and thermal profiles. Iterate tooling and process parameters, then scale with qualified suppliers who can demonstrate consistent metrology and process control.